Whenever you find your support team repeating the same action or sending the same reply to one conversation after another, that's a usually a good sign that you could use a macro. Macros can save your team a ton of time by automating common replies or making common updates to support tickets. Macros can also help keep your tone consistent across replies from multiple members of your staff.
In this article, we'll run through the different actions that macros can perform, and then go step-by-step through creating and using them.
Understanding what you can do with macros
Unlike traditional 'canned response' macros, Kayako Classic macros can do much more than saving reusable replies. In all, you can use macros to perform seven different types of updates:
- Add reply content - Adds text to the reply box. The text can be edited before you send the reply to your customer.
- Set ticket department – Updates the ticket department, if you wish to move the ticket to another department.
- Set ticket owner - Assigns the ticket to a specific staff member. You can also unassign a ticket using this action.
- Set ticket type - Updates the ticket type.
- Set ticket status - Updates the ticket status.
- Set ticket priority - Updates the ticket's priority.
- Add tags to the ticket - Adds any tags you specify to the ticket. You can add as many tags as you like.
You can use a single macro to make updates to any number of combination of these ticket attributes.
So, for example, let's say your support team is getting a lot of requests coming in about the billing on their account. The replies to these requests are nearly identical, regardless of which customer they're talking to. Plus, each of these tickets needs to get reassigned to a particular team member in the Billing department, along with a couple of updates to the ticket's attributes.
By creating a new 'Move ticket to Billing' macro, you can capture all of those updates, and the standard reply text and make it available so that anyone on your support team can use it when replying to a ticket.
So, now that you have a sense of what you can do with macros, lets look at actually building one.
Creating and organizing macros
You can create as many macros as you need. If you start using them widely across your team, it's also useful to group them into categories, according to team or purpose or whatever makes the most sense for your team. We'll go through creating both macro categories and individual macros below.
NOTE: To create or edit macros, you'll need a staff account with the 'Ticket macros' permission.
To create a new macro category and macro:
- Sign into Kayako Classic and go to the staff control panel.
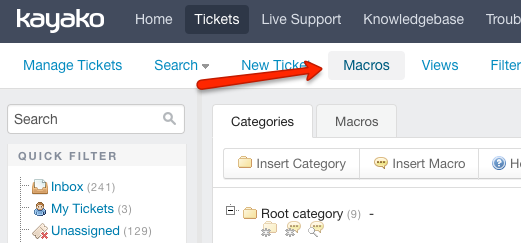
- Choose Macros from the Tickets menu.
- Here, you'll see a list of any macros categories that have been created. Lets create a new one. Click Insert Category.
- In Category name, add a descriptive title for the category, like 'Ticket assignments'.
- We'll use this as a top tier category, so leave Parent Category blank.
- We also want to share this macro with other people, so leave Availability set to 'Public'.
- Finally, since we want our whole team to be able to use it, leave Restrict to specific Team list set to 'All Staff Teams'.
NOTE: You can also limit the visibility of a macro to just yourself by making it private or to a specific team. - Click the Save button to create your new category.
- Now that we've got somewhere for it to live, let's create a macro to move a ticket to the Billing department. Click the Insert macro button.
- In the Macro Title field, add descriptive title, like 'Move ticket to Billing'.
- Next, you'll select a Category, like 'Ticket assignments' that we created above.
- Then you can add your standardized reply text to the Reply Contents box.
NOTE: Your agents will be able to edit this text before they send the reply to the customer. - Switch to the 'Properties' tab.
- Here you can choose to change as many or as few ticket properties as you like. From Set department choose which department to assign the ticket to, for example 'Billing'.
- Choose a particular staff member to assign the ticket to from Set ticket owner.
- From the next three, you change the ticket's type, status, and priority, respectively.
- And finally, in the Add tags to the ticket field, you can add one or more tags to add to the ticket. In our example, since we're transferring a ticket between departments, we might add 'transferred' as a tag here.
NOTE: You can add as many tags as you like – hit return to enter a tag and start typing a new one. - When you have all your changes to ticket properties locked in, click the Save button to create your new macro.
Now, when your team is replying to tickets, they'll have the option to select this macro from the list. Read on for instructions on how to use macros when replying to tickets.
Using macros in ticket replies
Once you've defined one or more macros in Kayako Classic, they'll be available to use when replying or forwarding a conversation.
To apply a macro to the ticket:
- From the 'Reply' or 'Forward' tab on a ticket, click the Macro dropdown on the 'Quick Insert' bar.
- Search or scroll to the macro you want and click to select it.
- Review the changes to the ticket, and make any updates to the reply text you want.
- If you're happy with the changes, click Send to update the ticket.
Sukhpreet Anand