Email is Kayako Classic's primary support channel. From your first day with your Kayako Classic helpdesk, your team can start communicating with customers using the default support address: 'support@yourcompany.kayako.com'. Any email sent to this address becomes a ticket in Kayako Classic.
In addition, if you want to offer email support from an existing email address – like 'support@yourcompany.com' – you can certainly do so. You'll just need to set up an email queue for each address.
Setting up email queues allows Kayako Classic to go out, check a specific email address for messages, and then pull those messages into your helpdesk.
Once you've set up a queue for an email address, any message sent to that address will be converted into a ticket and added to Kayako Classic. Your staff will be able to view and respond to the request just as they would any other ticket. In addition, when a staff member replies to a ticket, the customers will receive the reply in their email inbox and can continue to respond via email.
In this article, we’ll walk you through the basics of how Kayako Classic handles incoming emails and then show you how to add and configure email queues.
NOTE: For help optimizing the performance of your email queues, refer to our article on the subject.
Understanding how email queues work
Every Kayako Classic account starts out with a default email queue that is set up to handle any emails coming into ‘support@yourcompany.kayako.com.’ From the start, any email sent to this address will be automatically converted into a ticket.
For any non-Kayako email address you want to use, you'll create additional email queues. For example, you might want to set up several email queues for different addresses at your company domain — let’s say, 'support@yourcompany.com', ‘sales@yourcompany.com’, and 'info@yourcompany.com'.
Each email address gets its own queue in Kayako Classic, which will use one of three methods to connect to your account:
- Pipe – To use this method, you’ll need to set the email address to forward everything to ‘support@yourcompany.kayako.com.’ Once you have the forwarder set up on your end, Kayako Classic will be able to capture emails that come into this account.
NOTE: Get help in our article about forwarding emails to your helpdesk. - POP3 – If your email server supports POP3 access, you use this method by filling in your server credentials so Kayako Classic can check your mail server.
NOTE: The server job required for POP3 email fetching will be automatically created for OnDemand customers. Download customers will need to set up their own server job. - IMAP – If your email server supports IMAP access, you can use this method by filling in your server credentials.
NOTE: The server job required for IMAP email fetching will be automatically created for OnDemand customers. Download customers will need to set up their own server job.
Once you've added a queue for an address, you'll also be able to tell Kayako Classic how to treat tickets that are created from that queue. For example, you could configure your email queue for 'sales@yourcompany.com' to automatically assign its tickets to the Sales department and set their priority to 'High'.
Now that you have an idea of how emails queues work, let's go through the process step by step.
Adding & Configuring Email Queues
In this section, we’ll take you through the basics of adding and configuring an email queue.
NOTE: To add a new email queue in Kayako Classic, you'll need an administrator account with the 'Email Queues' permission.
To add and configure an email queue:
- Log into the Admin control panel.
- From there, find Email Parser on the sidebar and click to expand the menu.
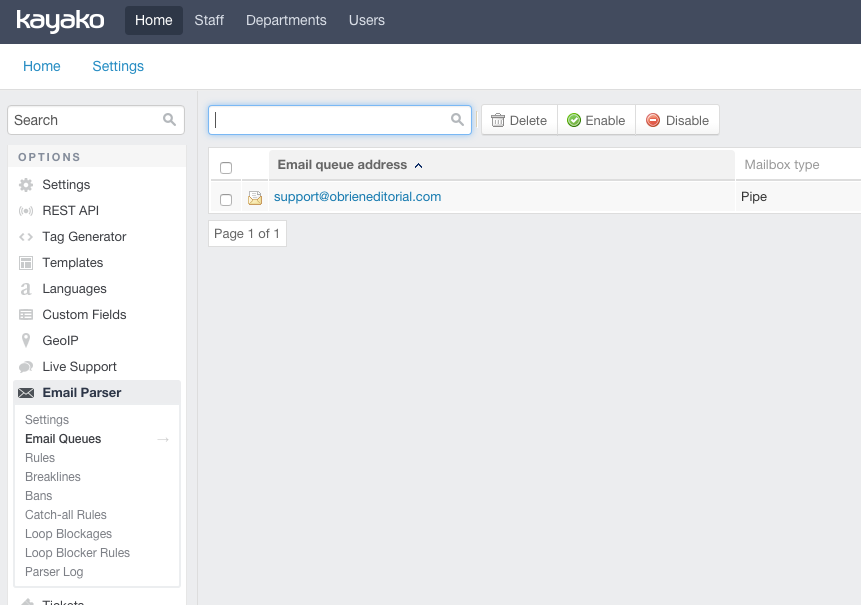
- On the expanded menu, click Email Queues, which will take you to the 'Email Queues' page:
- Review the list of all the email queues that have been created. If you're just starting out, you'll see that only the default queue has been set up.
- To create a new queue, click the New button in the upper-right.
- In the Email Queue Address text box, enter the email address for which you’d like to create a queue.
NOTE: Remember, all emails that are sent to this address will be converted into tickets and added to Kayako Classic. - The Queue Type field is set to ‘Tickets,’ by default, so you can leave that be.
- From the Mailbox Type menu, select which method Kayako Classic should use to capture email messages.
NOTE: For POP3 and IMAP queues, you'll need to have your email server credentials ready to enter. - At this point, you'll test that Kayako Classic can connect to the account you specified. Click the Verify Connection button at the top of the screen.
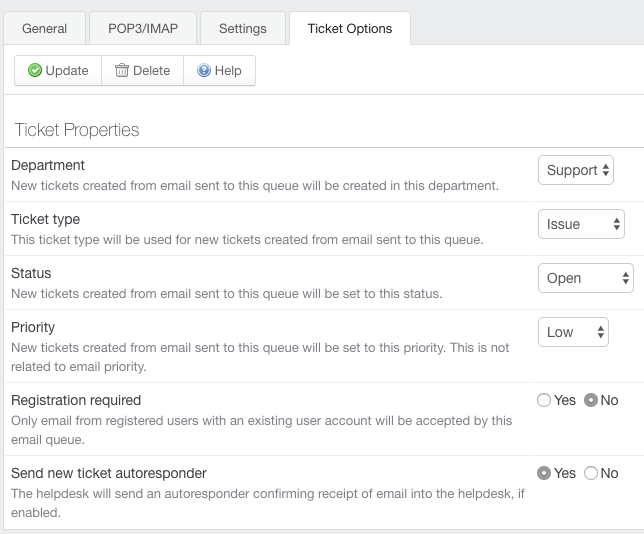
- Once the verification is complete, it’s time to configure the tickets that will be created from this email queue. Back on the main screen, click the Next button to proceed to the 'Ticket Options' tab:
- Here, you'll need to tell Kayako Classic how to handle the tickets created from this email queue. Your main options are:
- Department – Select a Department to which the ticket will be automatically assigned.
- Type – Select a default ticket type for the messages that come in through this email queue. For the ‘sales@yourcompany.com’ example, you’d probably choose ‘Lead’ here.
- Status – Select a default status for the tickets.
- Priority – Select the priority these tickets should be assigned when they come in.
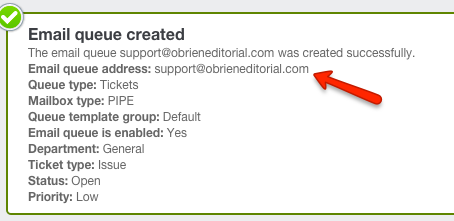
- When you’re done configuring the tickets, it’s time to put the email queue into action. Click the Insert button at the top of the screen.
- You’ll be taken back to the 'Email Queues' screen, where you can find your queue in the list. You should see a success message with the details of your new queue:
- Repeat the process above to create additional email queues.
When you're done, we recommend you head over to our article on advanced email queue configuration, so you can fine tune your queues' performance.
Kelly O'Brien