Customers reach out to you for answers to questions, issues, and problems of all shapes and sizes. As your team provides support, they will eventually start to see tickets come in that are about similar topics or even duplicate tickets that ask exactly the same question.
To make it easy to compare similar tickets and reuse solutions from resolved tickets, Kayako Classic has the option to link related or duplicate tickets. Having that information in easy reach means you team can answer questions and solve issues with speed and confidence.
In this article, we'll explain how ticket linking works in Kayako Classic, and then walk you through the steps for linking and unlinking tickets, as well as adding to the types of links you can use.
Understanding how ticket linking works
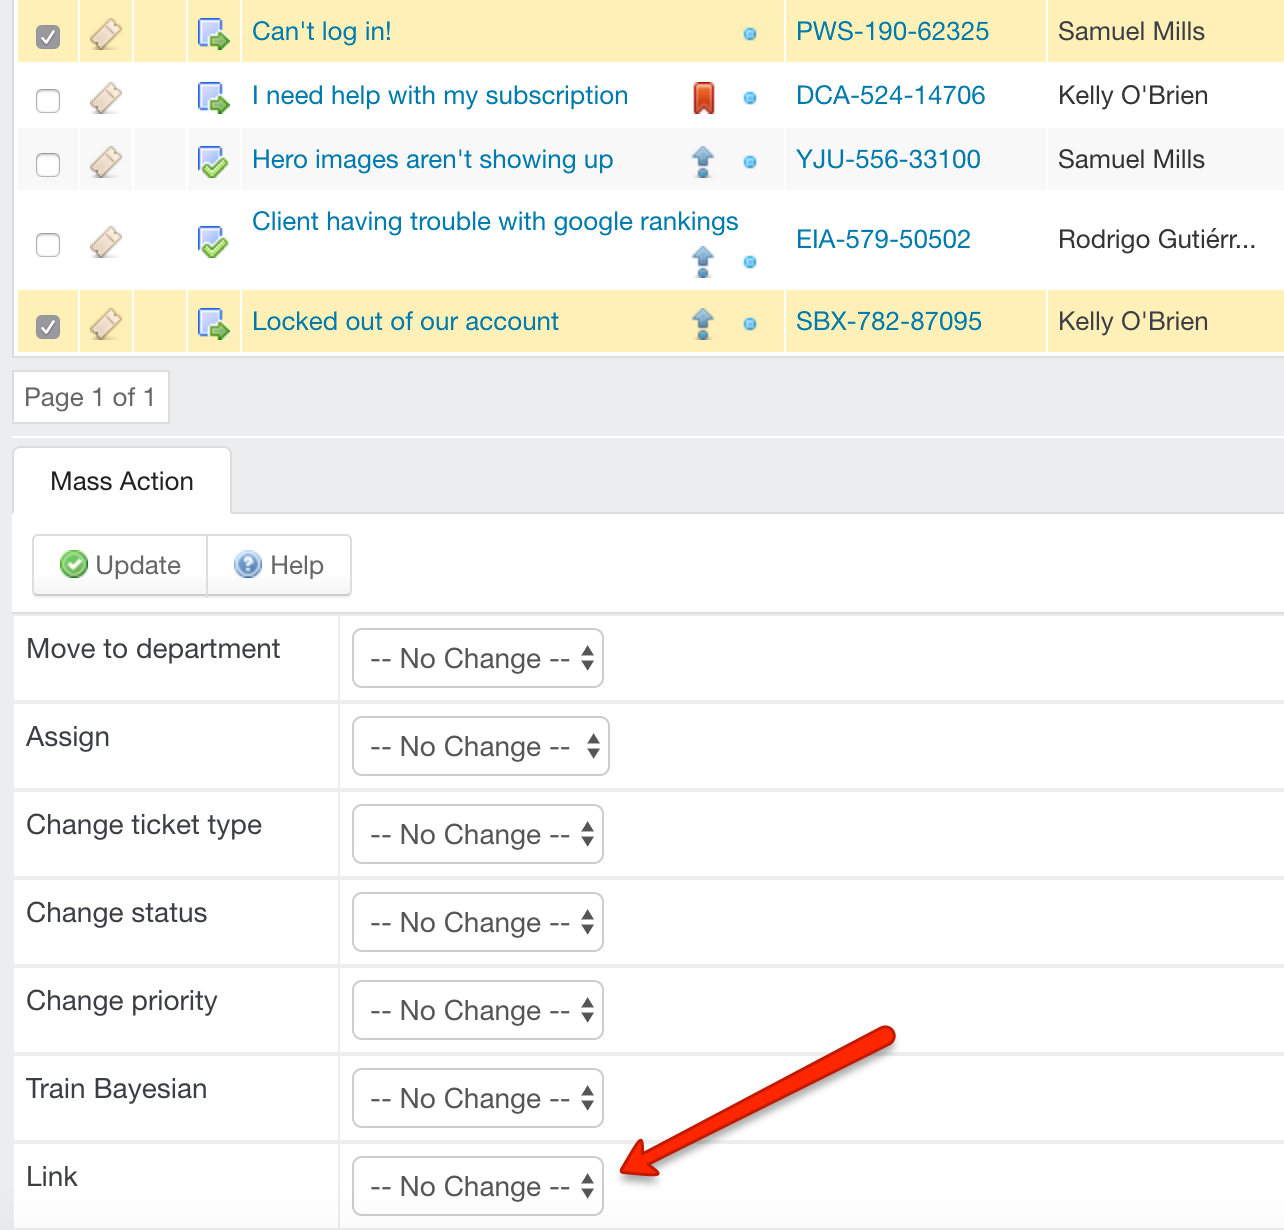
In the staff control panel, once you've selected two or more tickets you'll find the option to link them in the 'Mass Action' section:
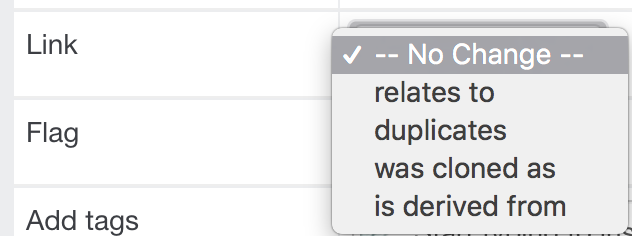
With that option, you'll be able to choose what type of link to use. The different link types make it easier for your team to understand the relationship between tickets, at a glance. You can choose from one of the default link types to denote that the tickets are related to, duplicated by, cloned from, or derived off of one another.
You can also add, modify or delete link types from the admin control panel to suit your team's needs.
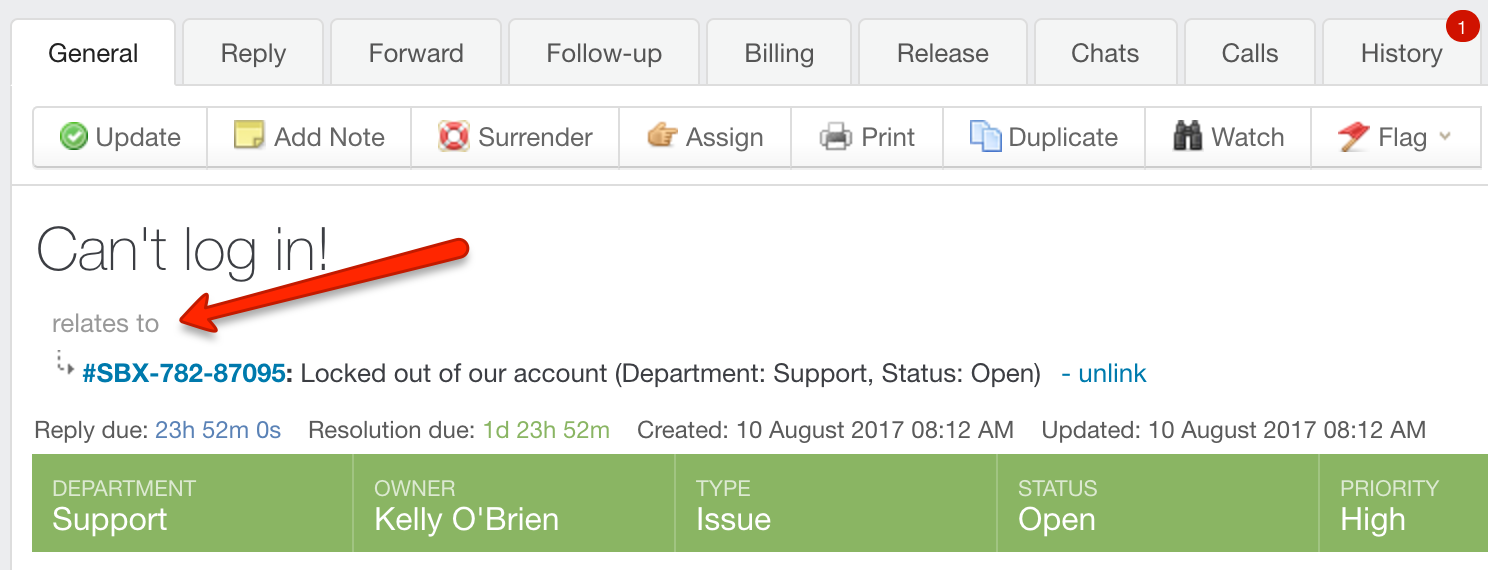
Once you've linked two or more tickets, you'll be able to see that link on the ticket, for easy referencing. You'll see the IDs of the tickets it's linked to, the relationship between tickets, and a one-line summary of any linked tickets.
You'll also have the option to click unlink to break the relationships between tickets.
Now that we've talked about how ticket linking works, let's have a look at the process.
Linking related or duplicate tickets
The following steps will show you how to link and unlink related or duplicate tickets from your ticket queue
NOTE: To link tickets in Kayako Classic, you will need a staff account with the 'Tickets' permission.
To link related or duplicate tickets:
- Sign into the staff control panel.
- Click Inbox in the sidebar.
- Check the box next to the tickets you would like to link.
- Scroll down to the bottom of the screen to see the 'Mass Action' section.
- Click on the Link dropdown.
- Select the type of link that describes the relationship between the two tickets.
NOTE: You can edit this list from the admin control panel. See instructions below. - Click the Update button link the tickets.
Each of the tickets you just linked will now display the link and other ticket IDs in the header. You can remove a link from a ticket by clicking Unlink in the header.
Adding or deleting ticket link types
Depending on your team's needs, you can add or delete additional types of ticket links. When creating a new type of ticket link, you'll specify a name and a display order.
NOTE: To modify ticket link types in Kayako Classic, you will need an admin account with the 'Ticket links (relationships)' permission.
To edit the available ticket link types:
- Sign into the admin control panel.
- Click Tickets in the sidebar, and then Links.
- You'll see all the existing link types in a list. Check the box next to a type and click the Trash button in the top toolbar to delete a type.
- Click on the New button to create a new link type.
- In the Link title box, add a descriptive name for the link type.
- Add a value for the type's Display order, to tell Kayako Classic where in the list it goes.
- Click the Insert button to add your new link type.


Stephanie Gonzaga