This article provides a starting point for helping your users submit their first tickets on your support site. The sections below will cover the basic steps your users will need to follow to get started. Since every Kayako-powered support site is different, the steps and screenshots below may vary from what your users will experience. That said, this guide is designed as a starting point, which you can modify to suit the particulars of your support site.
NOTE: Everything below is directed at the end users of your support site. Feel free to copy this article and edit it to fit your needs.
Welcome to our support site
Thanks for visiting our support site! We're here to help you answer any questions you may have. To make it easier to reach out to our support team, we've put together this guide to help you get started. Below, you'll find instructions for creating an account, as well as submitting and tracking your support requests.
Creating an account
The first step is to register for an account on the support site. This will let you log in and submit tickets to our support team.
To create an account:
- Open your web browser and visit [support.yourcompany.com].
NOTE: It's useful to bookmark the site so you don't have to type it in every time. - Click the Register button. It should look like this:
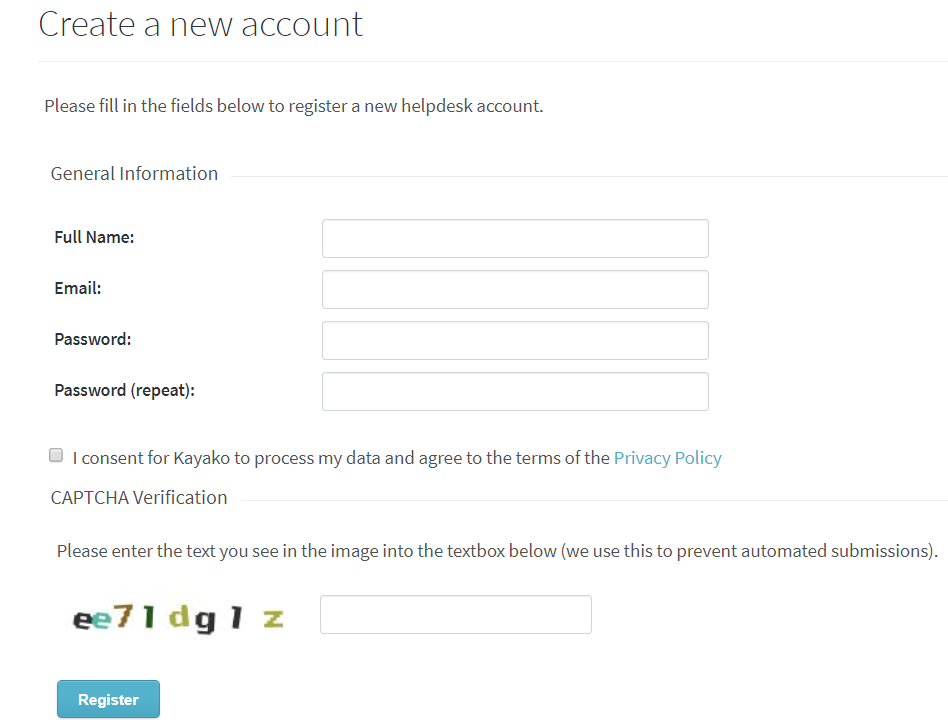
- This will take you to a form where you can fill in the details for your user account:
- Fill in your details, complete the CAPTCHA questions and click Register.
- We'll send you an email address to confirm that your account has been created. You'll need to open up the confirmation email and verify your account.
- Once you've done that, you'll be ready to log in.

Logging in
Your next step is to log into the site.
To log into the support site:
- Switch back to the support site in your browser.
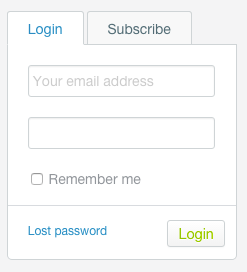
- Find the login form, which will look something like this:
- Enter the email address and password you used when registering on the site.
- You'll be taken to a page where you can fill in details for your account profile.
- Add any details you like, and click the Update button to save your changes.
- Now you're ready to get in touch with our support team.
Submitting your first ticket
Requests to our support team are handled in the form of support tickets. This section will walk you through the process of submitting a support ticket.
To create your first ticket:
- Head to the front page of the support site and make sure you're logged in.
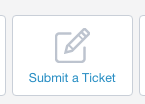
- Click the Submit a Ticket button:
NOTE: You can also click the 'Submit a Ticket' link on the top navigation menu. - From here, you'll have the opportunity to fill in the details for your support request. We'll go through each one step-by-step.
- First, select a department to submit your ticket to. This will tell our support team what your request is related to.
- Click the Next button.
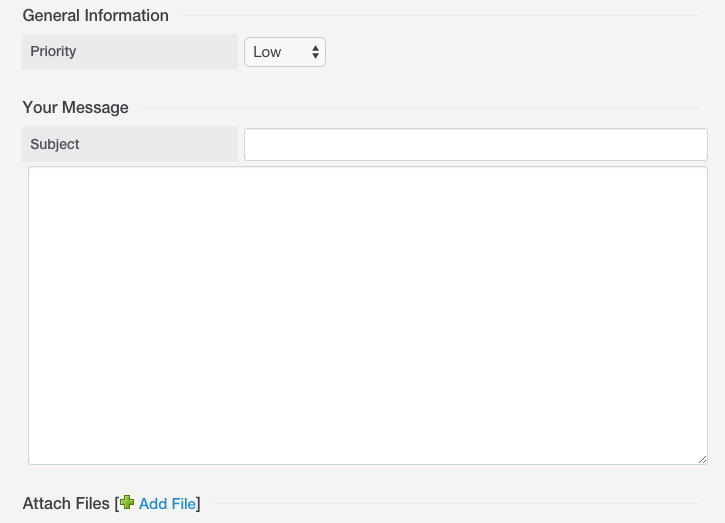
- On this screen you'll be able to describe the problem you're having:
- First, from the Priority pull-down, choose the option that best describes the problem you're facing. This is how we try to think about each priority level:
- 'Low' – You have a question about something, but everything's still working okay.
- 'Normal' – You've run into an issue that's disruptive, but isn't breaking anything critical.
- 'High' – You've encountered a serious problem that's having a huge impact, but hasn't completely broken everything.
- 'Urgent' - Everything is broken. Nothing works at all. HELP!
- Next, in the 'Subject' field, give us a brief description of what's happening.
- Then, in the big text area, go into details. The more specific you can get about what you're experiencing the better.
NOTE: Once you start typing in the description for your ticket, suggestions for knowledge base articles that might be relevant to your request will appear. - When you're done writing up your issue, you also have the option to attach a file (photo, screenshot, PDF, etc.) that would help illustrate your issue:
- Click the Add File link.
- Click the Choose File button.
- Select the file you want to attach and click the Open button.
- Review the details of your ticket and click the Submit button at the bottom of the screen to send your request to our support team.
- Once your request has gone through, you'll see a confirmation screen. This means we've received your issue and someone on our team will be in touch as soon as possible.
Tracking and responding to existing tickets
Once you've submitted a ticket to the support team, you have two options for following up on it:
- Option 1: Email - In addition to receiving a confirmation email when we've received your request, you'll also get an email when we have replied. You can simply reply to that email (without changing the subject line) and your responses will come back in to our support team.
- Option 2: Support Site - Alternatively, you can view and respond to any tickets you have open directly from the support site interface. Below, you'll find instructions for using the support site to track your tickets.
To access your existing tickets from the support site:
- Head to the front page and make sure you're logged in.
- You'll see that the Register button has been replaced! Click the newly revealed My Tickets button, which looks like this:
NOTE: You can also click the 'MyTickets' link on the top navigation menu.
- You'll be taken to a page with a table that list all of your tickets.
- The table provides some basic information about the status of each ticket, but clicking on the ticket's subject will give you a much closer look.
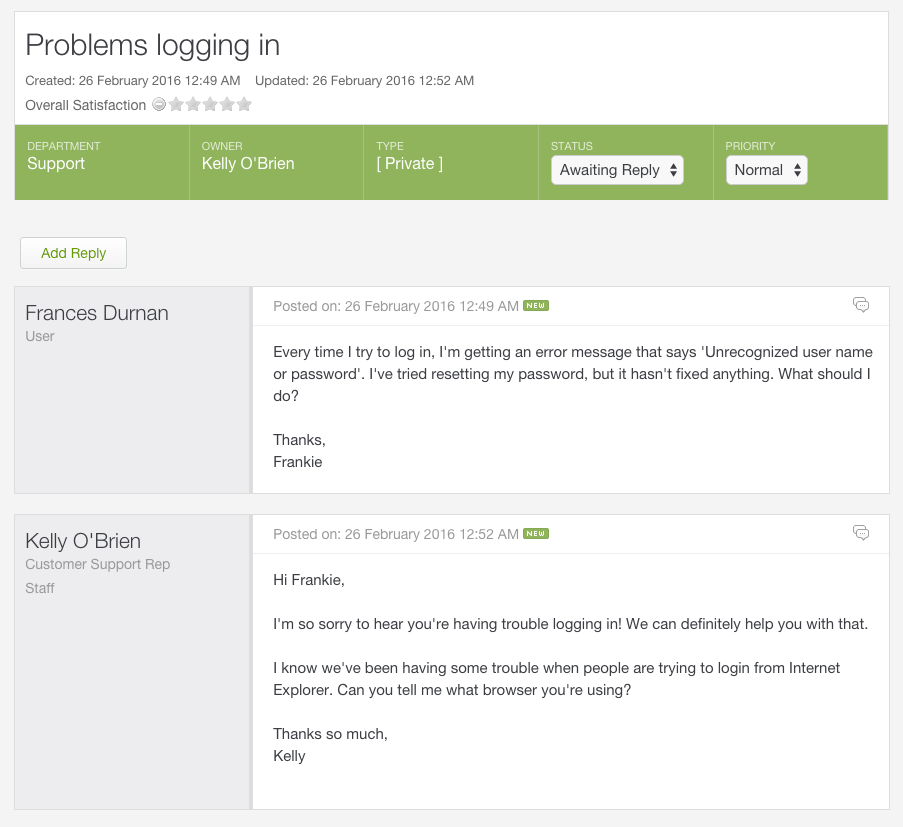
- Let's take a look at this example ticket:
- You can see at the top the department, owner, type, status, and priority of your request. You have the option of modifying the last two options.
- From the Status dropdown, if your problem has been resolved, you can select 'Closed' at any time.
- From the Priority dropdown, if your problem has gotten worse or better, you can adjust the priority here.
- In addition, you can also see a complete history of your request, starting with your initial message at the top.
- If your ticket is in need of a response, click the Add Reply above the conversation history.
- A large text box will open up and you can type your response, as well as attaching any additional files that would be useful.
- When you're done, click the Send button to submit your response.
- You can come back to this page at any point to check in on the status of your ticket.
We hope this has given you a good introduction to submitting and tracking tickets from our support site. And of course, if you have any questions, don't hesitate to contact our support team!
Gurpreet Singh