Customizing your Kayako Classic templates gives your team control over the appearance – and in some cases the functionality – of your emails and support center. Any time you update, upgrade, or reinstall your helpdesk, you'll need to back up and reimplement any template modifications you've made.
In this article, we'll give you an overview of the template backup and restoration process, and then get into the details of how to restore your template modifications after an update.
NOTE: We're going to talk about 'updating' your helpdesk throughout this article, but the process of restoring your templates is the same whether you're updating, upgrading, downgrading, installing, migrating, etc.
Understanding how to maintain your template modifications
Modifying your helpdesk templates takes a lot of time and effort, so by default, Kayako Classic goes out of its way to preserve those changes. When you update your product files, your modified templates will not be overwritten – even if the update includes changes to your templates. Instead, you'll have the chance to accept the new templates, compare them to your modified versions, and merge in your changes.
The safest way to do that is to follow these steps:
- Before you start the update process, you'll export a backup copy of any modified templates.
- You'll run through the update, which will include a fresh copy of all of Kayako Classic's templates – but it won't overwrite any of your changes.
- Once you're up and running, you'll go into the admin control panel and review your templates. Any templates you've modified will be marked as 'out-of-date'.
- After double-checking that you have all your backups in hand, you can hit 'restore' to accept the fresh templates, and overwrite your modified ones. Don't worry, though – they won't be gone for long.
- For each template that's been updated, you'll export a copy, which will give you a local version of both the updated template and your modified version of the previous template.
- Using a diff & merge tool, you can review your changes, and incorporate them into the updated template.
- Once you've merged your changes, you can copy your modified, up-to-date template, and paste it into Kayako Classic.
- You can repeat the compare and merge process for any templates you've modified until you're fully up-to-date.
Now that you have a sense for the steps involved, let's get into the details.
Preserving your template modifications
For these steps, you'll need admin access to your Kayako Classic helpdesk, as well as your server, if you're running Download.
Back up your modifications
Your first step is to make sure you have full local backups of any templates that you've modified:
- Sign in to the admin control panel.
- Click Templates and then Import/Export in the sidebar.
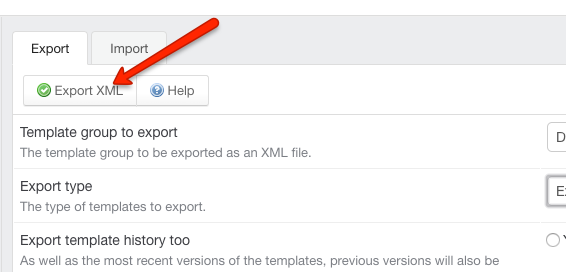
- From the Template group to export dropdown, select the group you want to backup.
- From the Export type dropdown, choose 'Export modified templates'.
- Click the Export XML button.
- Save your backup somewhere handy.
Restore fresh template versions
Once you've finished updating, it's time to go in and review your templates. For any that you've modified, you'll need to manually overwrite them with the fresh templates that came over while you were updating.
- Sign in to the admin control panel.
- Click Templates and then Restore in the sidebar.
- From the Template group dropdown, select the group you want to update.
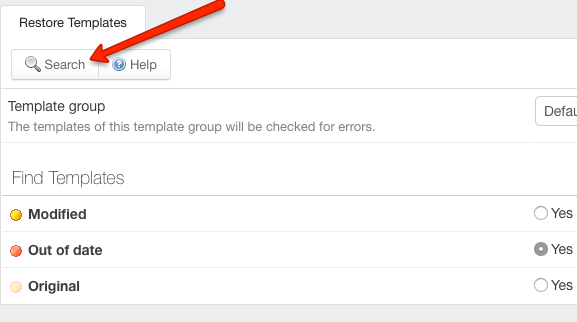
- Next to Out of date select 'Yes', to find a list of all of your out-of-date templates.
- Click the Search button.

- You'll see a list of any of the templates that you'd modified that need to be updated to the newest versions. Select all the templates by clicking the checkbox in the header row.
NOTE: This is a great opportunity to make totally double-sure you have local backups of your modified templates.
- When you're ready, click the Restore button on the page to overwrite your modified templates with the new versions.
Compare, merge, and paste in your modifications
The complexity of this final step will depend on how heavily modified your templates are. If it's just a few one-line changes, it should be pretty quick. More substantial changes might take longer to incorporate.
But whichever boat you're in, the process is the same:
- From the admin control panel, under 'Templates' click Import/Export.
- From the Template group to export dropdown, select the group you want to modify.
- Leave the Export type dropdown set to 'Export all templates'.
- Click the Export XML button.
- Save your exported files to the same place you have your modified template backups.
- If you don't have one already, download a diff tool, which will help you compare the two versions of each template.
NOTE: Many development tools – like Xcode, Eclipse, Visual Studio, etc. – have diff utilities built in, but you can also use standalone tools like Meld (free, OS X), Kaleidoscope ($, OS X), or Beyond Compare ($, cross-platform). - For each template you've modified, run a diff between the customized version and the fresh default version.
- Scan through the diff, and merge your changes into the fresh template.
NOTE: You may need to edit your modifications to reconcile them with the new template. - When you've incorporated all of your modifications into the updated template, save the XML file.
- Repeat the previous three steps for every template you've modified.
- Go back to the Kayako Classic admin area and click Templates and then the Templates suboption to edit your templates directly.
- From the Template group dropdown, select the group you want to update.
- Find your first modified template in the list, and click to open it.
- Select the entire template contents and delete it.
- In your local XML file with the modified, up-to-date template contents, select everything and copy it.
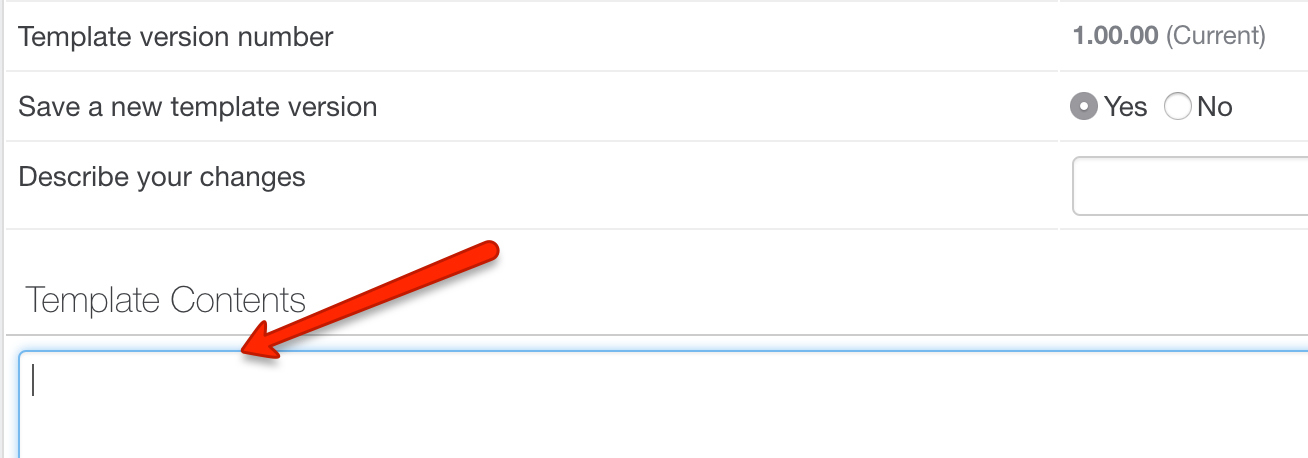
- Paste it into the Template Contents text area in Kayako Classic.
- In the Describe your changes text box, enter a changelog message, such as 'Restoring template modifications after upgrading to 4.80.'
- Click the Save & Reload button to save your changes.
- Repeat the previous six steps for every template you've modified.
- When you've made all of your template updates, you have one last step – rebuilding your helpdesk cache, which you can do by clicking Diagnostics in the sidebar and then Rebuild Cache.
Your template modifications will now be reflected across your helpdesk and support site.
Dhiren Nangla