Kayako Desktop lets your support team manage real-time customer interactions via live chat and (for Windows users) over the phone. Each member of your team will need to install Kayako Desktop on their computer, and then connect it to your Kayako Classic instance, whether it's OnDemand or Download. From there, they'll be able to monitor visitors to your website and handle customer conversations in real-time.
The installation process for Kayako Desktop depends on whether you're installing it on Windows or Mac—we'll cover both versions, below.
Installing Kayako Desktop for Windows (KDFW)
To install Kayako Desktop for Windows:
- Download the latest stable release by clicking this download link .
- Open the file, and hit the Run button on the security window that appears.
- Click the I accept the terms of the License Agreement button and then click Next >.
- Choose whether you'd like to add 'Start Menu Shortcuts' or not, and then click
Next >. - Select a location to install your files in the Destination Folder field.
- Click Next > to begin the installation.
- On the next screen, click the Finish button to complete the installation.
- Next you'll see the first screen of the Kayako Desktop Setup Wizard.
- Select your language, and click the Next > button.
- On the accounts screen, click the Add... button to connect to your Kayako Classic instance.
- In the 'Create New Account' window that appears, add a name for your account in the Set a name for this account field.
- In the next field, enter the full URL for your support site, e.g. 'https://support.[yourcompany].com'.
- Check the box if you want Kayako Desktop to automatically log in to this account when you start.
- If you do choose to log in automatically, you can check the next box to set a default status for you at startup.
- In the fields in the 'User Credentials' section, enter the username and password you use to log in to your support site.
- If you like, you can customize the tab color of your chat windows, by dragging the Tab Color slider.
- Click the OK button to finish creating your account.
- Click the Next > button to go to the last screen.
- On the 'General Settings screen, you can select your startup options, as well as choosing your refresh interval.
- When you have your settings configured, click the Finish button to launch KDFW.
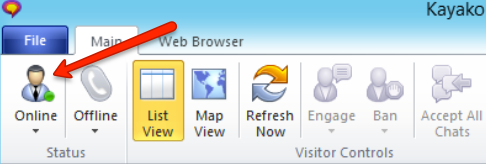
- If KDFW has connected to your support site successfully, you'll see the 'Online' indicator in the upper-left.
Now that you're all set up, head over to our article on using KDFW to talk to your customers!
Installing Kayako Desktop for Mac (KDFM)
To install Kayako Desktop for Mac:
- Download the latest stable release by clicking this download link .
- Open the file to launch the installer.
- On the 'Introduction' screen, click the Continue button.
- On the 'License Agreement' screen, click the Continue button and then the Agree button in the pop-up window that appears.
- On the 'Destination Select' window, select the drive you want to install Kayako Desktop on, then click Continue.
- On the 'Installation Type' screen, click the Install button to begin the installation process.
- Enter your computer's administrative password and click Install Software.
- The 'Summary screen should display a 'The installation was successful.' message.
- Click the Close button to finish the installation.
- Go to the 'Applications' folder and open 'Kayako Desktop'.
- On the front page, click the Add an account button to connect to your Kayako Classic instance.
- In the 'Preferences' window that appears, add a name for your account in the Account Name field.
- In the Help desk URL field, enter the full URL for your support site, e.g. 'https://support.[yourcompany].com'.
- In the User Name and Password fields, enter the credentials you use to login to your support site.
- Check the Auto-connect box, if you want KDFM to automatically log in to this account when you start.
- Click the Save button to add your account.
- Click the Close button in the upper right to close the 'Preferences' screen.
- Click on the account you just added to connect to your Kayako instance.
- If Kayako Desktop has connected to your support site successfully, you'll see the 'Online' indicator in the upper-right.

Now that you're all set up, head over to our article on using KDFM to talk to your customers!
Kelly O'Brien