Kayako Desktop provides you with a platform to interact with your site visitors and manage your support chats effectively. By connecting Kayako Desktop to your Kayako domain, you can manage live chat requests that come in through the chat widget on your support site.
Kayako Desktop provides your support team an all-in-one tool for offering real-time support, including live chat, simultaneous conversations, visitor monitoring, support for multiple Kayako Classic instances, and much more.
Kayako Desktop comes in two flavors: one for Windows, one for Mac OS X. This article is about Kayako Desktop for Mac (KDFM).
NOTE: For help with Kayako Desktop for Windows, visit our KDFW article.
In this article, we'll give you an overview of how KDFM and Kayako Classic work together, and then walk you through KDFM's capabilities step-by-step.
Understanding how Kayako Classic and KDFM work together
Any agent that's going to be offering chat support will need to install KDFM and connect it to their Kayako Classic account. From there, they'll be ready to accept chat requests from your site visitors.
Anytime a new chat request comes in, KDFM will send your team a notification. Once an agent accepts the chat, they can interact with the customer directly. They also have the option to join ongoing chats or initiate chats proactively, from the visitor list in KDFM's main window:
Any chats that come in, whether an agent accepts them or not, will appear in under 'Live Support' in the staff control panel. Every message that goes back and forth will be added to the chat history.
Now that you have a sense for how KDFW and Kayako Classic work together, let's look at some of the common tasks you'll be using KDFW for.
Monitoring site visitors
To monitor visitors to your support site:
- Log into Kayako Desktop for Mac.
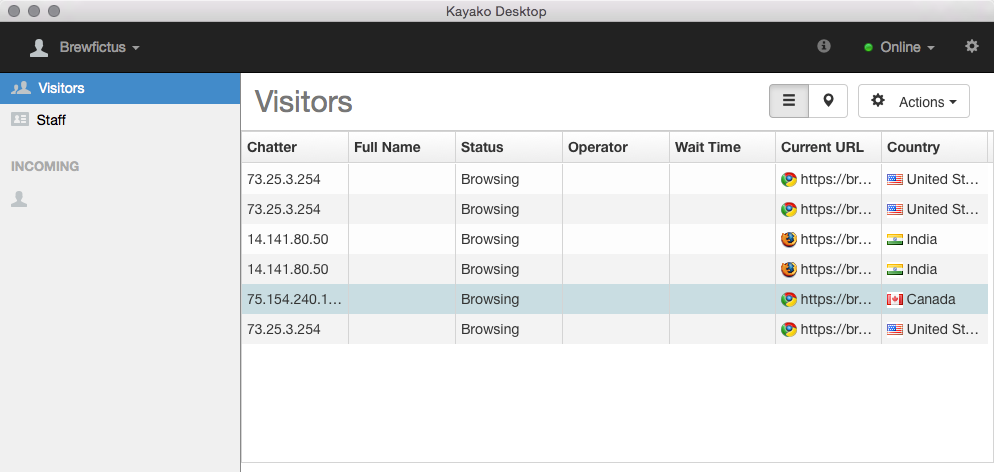
- The first screen you'll see is the 'Visitors' screen. As soon as a new visitor arrives on your support site, you'll see their IP address appear on a new row.
- When a visitor has initiated a chat, their name will appear in the 'Full Name' column.
- You can click the 'Wait Time' column heading to sort visitors by how long they've been waiting for a response.
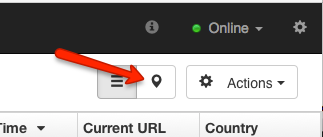
NOTE: You can sort by any of the other column headers, as well. - For a different view of your site visitors, you can click the location icon to see each visitor's location plotted on a map.
- Read on for instructions on how to initiate or accept chats with your visitors.
Handling incoming chats from customers
To pick up an incoming chat:
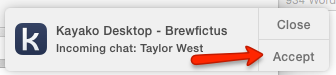
- When a site visitor clicks the 'Live Support' button on your support site, KDFM will display a notification.
- Click the Accept button to accept and start chatting with the customer:
- If multiple customers have initiated chats, you can find them in the sidebar under the 'Incoming' heading.
- Click a customer name to open a chat window.
- Click the Accept button to start chatting.
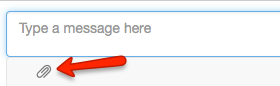
- From within the chat window, enter your message into the text area at the bottom and hit Enter to send it.
- You can also share files with the customer by clicking the paperclip icon below the text area.
- From the window that appears, find the file you want to share and click Open.
- At any point you can copy or save the chat transcript by clicking on the Actions dropdown in the upper-right.
NOTE: Remember that the chat will also be stored under 'Live Support' in the staff control panel. - When the customer leaves the chat, the conversation will move down under the 'Archived Chats' heading in your sidebar.
Initiating chats with customers
To initiate a chat with a site visitor:
- In addition to accepting incoming chats, you can also proactively initiate a chat with any visitor on your site, from the 'Visitors' screen.
- Select the visitor you want to chat with by clicking on their name.
- Click the Actions dropdown and select one of the following:
- Engage inline - Choose this option to pop up a full chat window on the page the visitor is currently viewing.
- Engage alert - Choose this option to display pop-up that reminds the visitor that they can chat with your support team.
- Once the visitor has accepted the chat, you'll be able to have a conversation with them as usual.
Customizing your notifications settings
To change your notification settings:
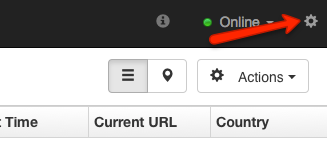
- From anywhere in KDFM, click the gear icon in the upper-right corner to open the 'Preferences' screen:
- From the sidebar, click the Notifications menu item.
- Here you'll see a list of all of the notifications that KDFM can send.
- To disable a particular notification, uncheck the 'Enabled' box.
- To change the notification sound for a particular event, click the [...] button.
- Select the sound file you'd like to use and click the Open button.
- When you've made your changes, click the Close button to leave the 'Preferences' screen.
Changing your online status
To change your account's online status:
- You can change your online status in two ways: manually or by adjusting the automatic settings.
- To change your status manually, click the Online status dropdown from the toolbar:
- Select a status from the list to change your status.
- When you're ready to come back online, you'll need to come back to this list and select it manually.
- To modify KDFM's automatic status changes, click the gear icon to open the 'Preferences' screen.
- From the sidebar, click the Chat menu item.
- You'll see two options here:
- Auto Busy when I'm chatting with [#] visitors - Enable this option if you want KDFM to set your status to 'Busy' automatically, whenever you're chatting with the specified number of customers.
- Auto Away when I'm idle for [#] minutes - Enable this option if you want KDFM to set your status to 'Away' automatically, whenever you're not interacting with KDFM for more than the specified number of minutes.
- When you've made your changes, click the Close button to leave the 'Preferences' screen.

Configuring other account settings
To modify your other account settings:
- From anywhere in KDFM, click the gear icon in the upper-right corner to open the 'Preferences' screen.
- Click the General menu item.
- On this screen, you'll see several options:
- Automatically launch Kayako Desktop at startup - Enable this option to launch KDFM whenever you start your computer.
- Automatically check for product updates - Enable this option to have KDFM check for updates regularly.
- Chat time interval, in seconds - Edit the value of this field to control how frequently KDFM checks with the server for new chat data.
- Data time interval, in seconds - Edit the value of this field to control how frequently KDFM requests updated site visitor and support agent data from the server.
- When you've made your changes, click the Close button to leave the 'Preferences' screen.
Kelly O'Brien