Providing real-time support to your customers is a critical piece of a good support strategy. Kayako Classic's live chat features enable your team to provide fast, friendly help to your customers from your support center, as well as any website you choose.
Live chat in Kayako Classic has a variety of moving pieces. In this article, we'll go over how those pieces interact and walk through how to get all of them working to provide a seamless live chat experience for your staff and customers.
Understanding how live chat works in Kayako
There are two sides to Kayako Classic's live chat functionality:
-
Staff-facing: To receive and respond to customer chats, your agents need two things:
- To belong to a 'Live Support' department. If you need help creating a new department or assigning staff to a department, refer to this user guide article.
- To be running Kayako Desktop, our desktop application for handling customer chats. Learn all about Kayako Desktop in our installation guide and our articles on how to use Kayako Desktop for Windows and Kayako Desktop for Mac.
- Customer-facing: To allow your customers to send your team live chat messages, you'll need to enable the live chat button on your support center, as well as adding an button to any external website from which you want to offer real-time support. You can choose from a variety of styles for your live chat buttons. We'll explain the process for generating and adding those live chat buttons in the next section.
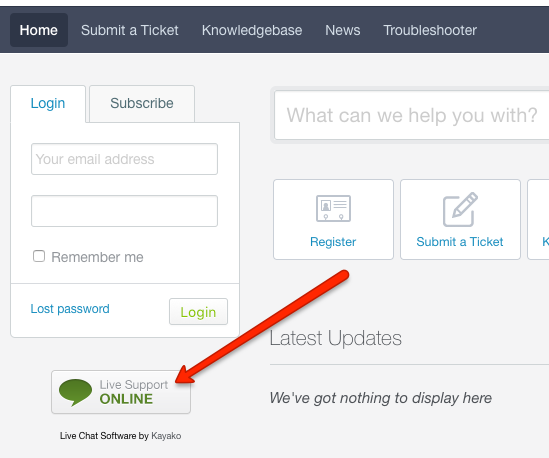
Once you've got both sides set up, your customers will see an button like this, which they can click on to start a new chat with your support team:
When a customer clicks the live chat button, they'll be asked to fill in a form with their details, including their name, email, and what they're looking for help with.
NOTE: You can also add custom fields to your chat form to capture additional information from customers before they start a chat.
Once the customer submits their details, the chat request will be sent to an available team member via Kayako Desktop. When the agent accepts the request, they'll be able to talk to the customer directly and hopefully resolve their issue.
NOTE: You can customize the header of your live chat window, with your company logo for example, by editing one of the live chat templates.
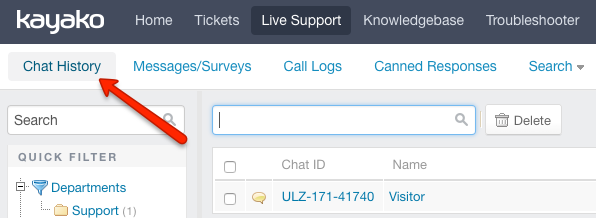
A complete record of the conversation is saved in the 'Chat History' log in the staff control panel:
So, now that you have a sense for how live chat works as a whole, let's talk a little bit about the live chat buttons themselves.
For your support center, a live chat button is available by default. It will switch to 'Online' as soon as one or more of your agents installs and signs in via Kayako Desktop. You can remove or customize your support center button by editing your templates, which we'll discuss in detail below.
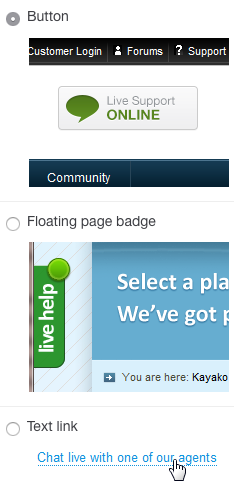
For other websites, the admin control panel includes an option to generate a customizable block of code, which you can add to your website. You'll have the choice to generate the code for either a button, a badge, or a plain text link:
Below, we'll share detailed instructions for enabling the live chat buttons on your support center and your websites, respectively.
Enabling and customizing your support center's live chat button
The quickest way to start offering real-time support is to have your team install Kayako Desktop and get online. That will automatically switch your support center's live chat button into 'online' mode. For many customers, that's all you'll need...
...however, you do have the option to customize the appearance of your live chat button. When adding live chat to an external website, you can choose from a variety of live chat styles. At any point you can also replace the standard live chat button on your support center with one of the other styles available.
NOTE: To customize the live chat button on your support center, you'll need an administrator account with the 'Use the live support tag generator', 'Template groups' and
'Templates' permissions.
To replace the standard live chat button:
- Sign into the admin control panel.
- Follow the instructions in the section below to generate a customized code block for a live chat button.
- Under the 'Templates' heading click the Templates link in the sidebar.
NOTE: Before editing Kayako Classic templates, we recommend you review our Template Editing Best Practices. - Click General to expand the template group and then the 'header' template to open it for editing.
- Search the template for
<!-- BEGIN TAG CODE -->. - Replace everything from that tag through the
<!-- END TAG CODE -->with the live chat code block you generated earlier. - Click Save to update the template.
- Visit your support center to see your updated live chat button.
NOTE: You may need to do a hard refresh to see your changes.
Generating and adding a live chat button to your website(s)
You can add Kayako Classic live chat to any and as many of your company's websites as you like. The admin control panel allows you to customize and generate a block of code that you can then drop into your website's source code.
NOTE: To generate a customized live chat button for your website(s), you'll need an administrator account with the 'Use the live support tag generator' permission.
- Sign in to the admin control panel.
- Click Tag Generator in the sidebar.
- Leave the Live Support Channel dropdown set to 'Chat'.
NOTE: You can also generate tags for a click-to-call button here, by selecting 'Call (click to call)'. Learn more in our click-to-call user guide article. - From the 'Tag Type' section, choose the style of live chat button you want to generate – button, badge, or a plain text link.
NOTE: The last tag type is for tracking vistiors, which you can read about below. - Click the Next button up top.
- In the 'Routing Options' section, you can choose particular departments or skills to route chats to, when they come in through this button.
- Under 'General Options', you can enable SSL, choose which template group your live chat button belongs to, or turn the chat form on or off.
- At the bottom of the form, you can use the Insert Variable and/or Insert Staff Alert buttons to pass information to Kayako Desktop, when a staff member accepts a chat.
- Before you generate your code block, switch to the 'Customize' tab:
- Here, you can customize the appearance of your button or badge.
- When you've finished, click the Generate Tag button.
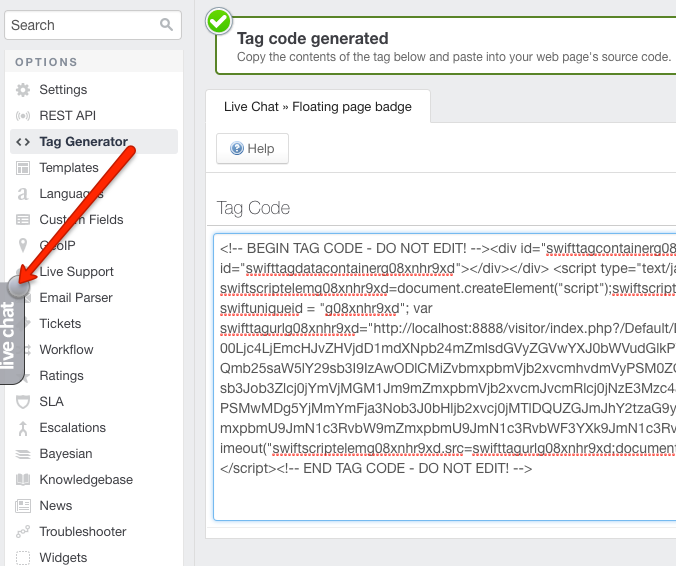
- The next page will display the code block for your customized live chat button, as well as a preview of what the button or badge will look like:
- Select the entire code block and copy it.
- Paste it into the source code of any page in your website(s) where you want live chat to appear.
NOTE: Do not edit the code block directly. If you need to change the function or appearance of the live chat button, we recommend generating a new tag.

Now, whenever one or more staff members is online in Kayako Desktop, your customers will be able to receive real-time support directly on your website.
So, what's that 'Visitor monitoring tag' about?
When generating a tag from the admin control panel, there is a fourth option called a 'Visitor monitoring tag':
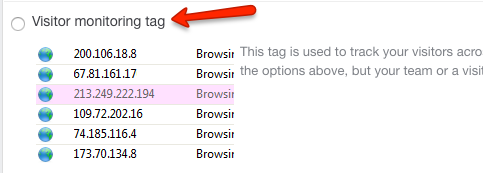
Generate this tag and add it to your website if you want to be able to proactively start chats from Kayako Desktop with visitors to your site, without giving them the option to start a chat on their own.
Akash Sethi